How to Caulk a Kitchen Sink: Step-by-Step Guide
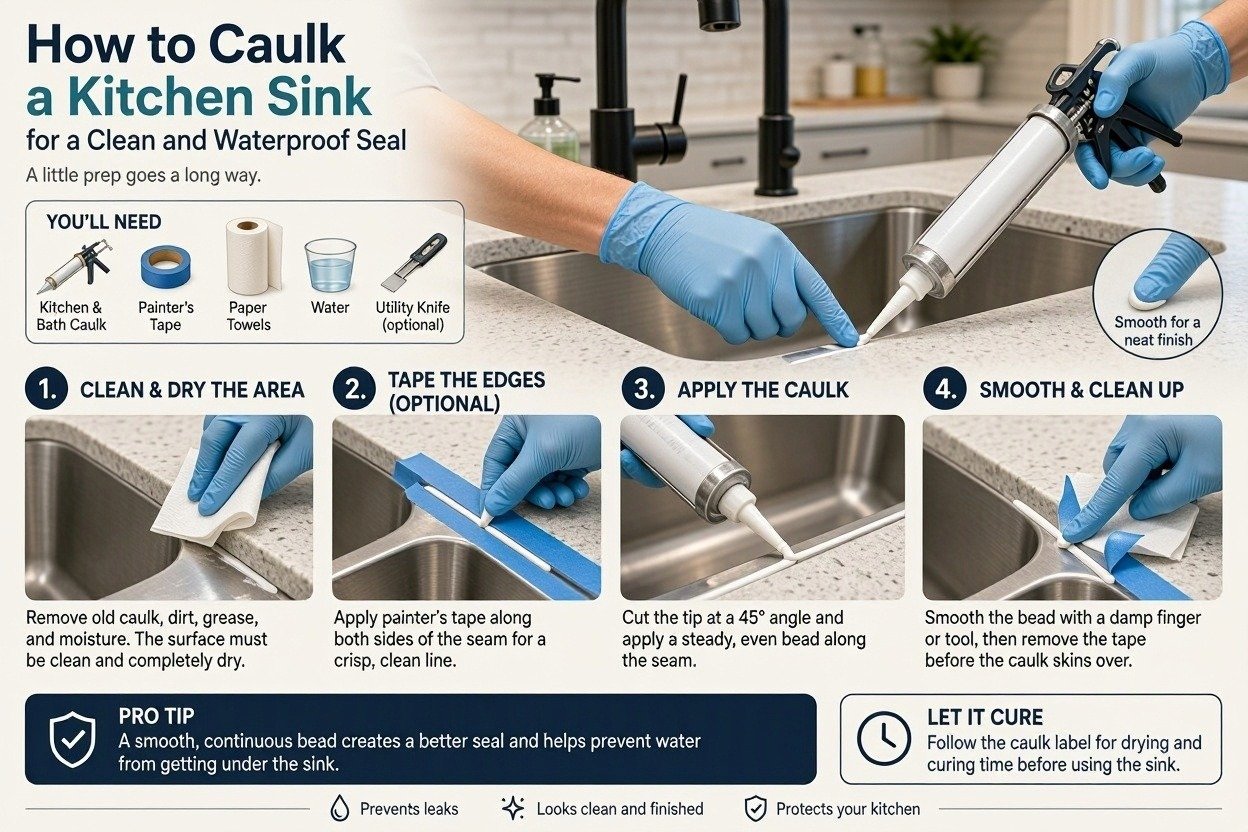
Quick answer: To caulk a kitchen sink, remove all the old caulk, clean and dry the joint, tape both sides, apply a continuous bead of the right sealant, smooth it, remove the tape while the bead is still wet, and let it cure as the label directs before using the sink. The sealant matters as much as your technique, especially if you have a natural stone countertop or metal fixtures.
In this guide, you’ll learn how to tell when your sink caulk needs replacing, how to choose a sealant for your countertop, how to handle gaps of different sizes, how to apply and smooth a clean bead, and how to fix common caulking problems.
Why the Caulk Around a Kitchen Sink Matters
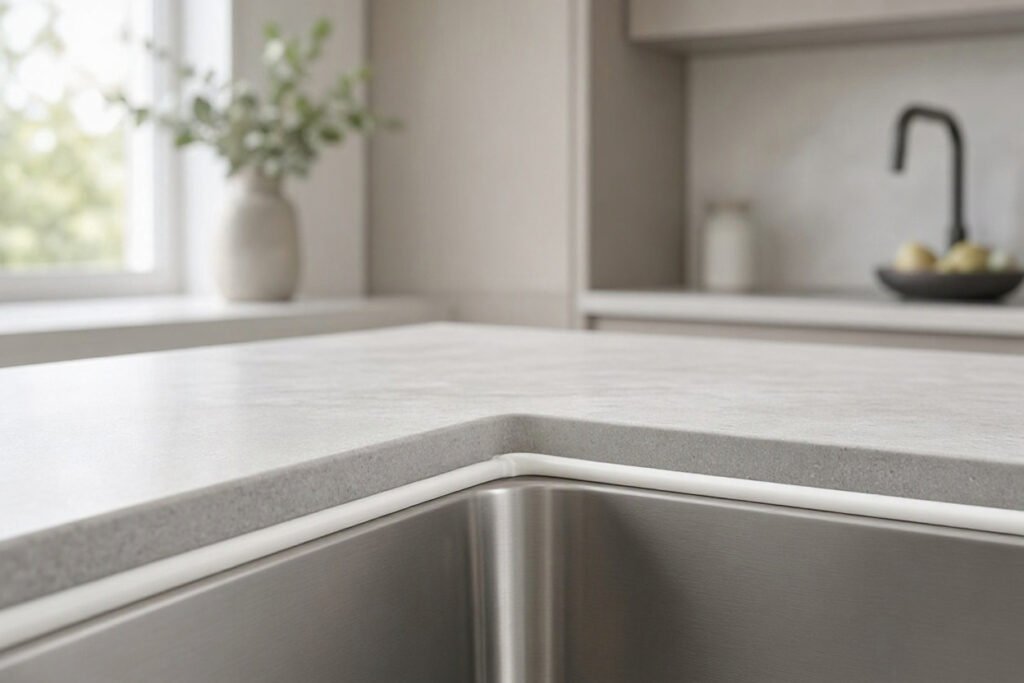
The caulk along the seam where your sink meets the countertop keeps water from running into the gap and down into places you can’t see. When that seal fails, water can reach the cabinet below and may lead to mold and damage over time.
Caulk does not last forever. It can crack, pull away, or discolor, and mold can start to grow on it. When that happens, replacing the bead is usually better than trying to patch or clean it.
How to Tell When Your Sink Needs New Caulk
Look closely at the whole seam, including the corners and the area around the faucet.
| What You See 👀 | What It Likely Means 🔍 | What to Do ✅ |
|---|---|---|
| Cracks or a brittle, chipped bead | The caulk has aged and lost its flexibility | Remove and replace it |
| A gap where the caulk pulls away from the sink or counter | The bond has failed | Remove and re-caulk |
| Dark spots that come back after cleaning | Mold or mildew in the caulk | Replace the bead, because mold is hard to clean out of silicone |
| Yellowed or discolored caulk | Age and dirt | Replace it if it also looks worn or loose |
| Damp cabinet floor or water stains below | Water may be getting through the seam, or a plumbing leak | Re-caulk, then rule out plumbing with our guide to a leak under the kitchen sink |
| The sink moves when you press the edge | A mounting problem, not just a caulk problem | Check the mounting before caulking |
Step 1: Choose the Right Sealant
Choosing the wrong product is the most common reason caulk fails or stains. Start with the label. It lists the surfaces the product is made for.
Silicone vs. acrylic latex
| Sealant Type 🧪 | Good For ✅ | Watch Out For ⚠️ |
|---|---|---|
| 100% silicone (acetoxy-cure) | Wet areas such as sinks. Flexible and water-resistant. Many kitchen and bath products use this chemistry | It releases acetic acid while curing, which causes the vinegar smell. Manufacturers say acetoxy silicones are not suited to acid-sensitive stone such as marble or limestone, or to some metals such as copper and brass |
| 100% silicone (neutral-cure) | Natural stone and sensitive metal fixtures. Lower odor | Check the label for your exact countertop material |
| Acrylic latex or siliconized caulk | Easy cleanup and paintable joints | It can shrink more and dry harder than silicone, so it may need replacing sooner |
Silicone bonds strongly, which is a benefit around water but makes it hard to remove later.
Match the sealant to your countertop
| Your Situation | What to Look For |
|---|---|
|
01 · NON-STONE Laminate, tile, or other non-stone countertops |
Choose a silicone labeled for kitchen and bath use that is compatible with the countertop material. |
|
02 · NATURAL STONE Granite, marble, or quartzite |
Use a sealant specifically approved for the stone. Some standard kitchen-and-bath silicones may cause staining. |
|
03 · ACID-SENSITIVE STONE Marble, limestone, or travertine |
Look for a compatible neutral-cure silicone rather than an acetoxy-cure product. |
|
04 · SENSITIVE METALS Copper, brass, or other sensitive metals nearby |
Consider neutral-cure silicone that is compatible with the specific metal and surrounding materials. |
|
05 · MANUFACTURED SURFACES Engineered quartz or solid surface |
Check the countertop manufacturer’s installation instructions and care guidance before selecting a sealant. |
If you are not sure, ask the sealant manufacturer or your countertop supplier before you buy. For more on pairing sinks and countertops, see our guide to kitchen sink countertop compatibility and our article on granite composite sinks.
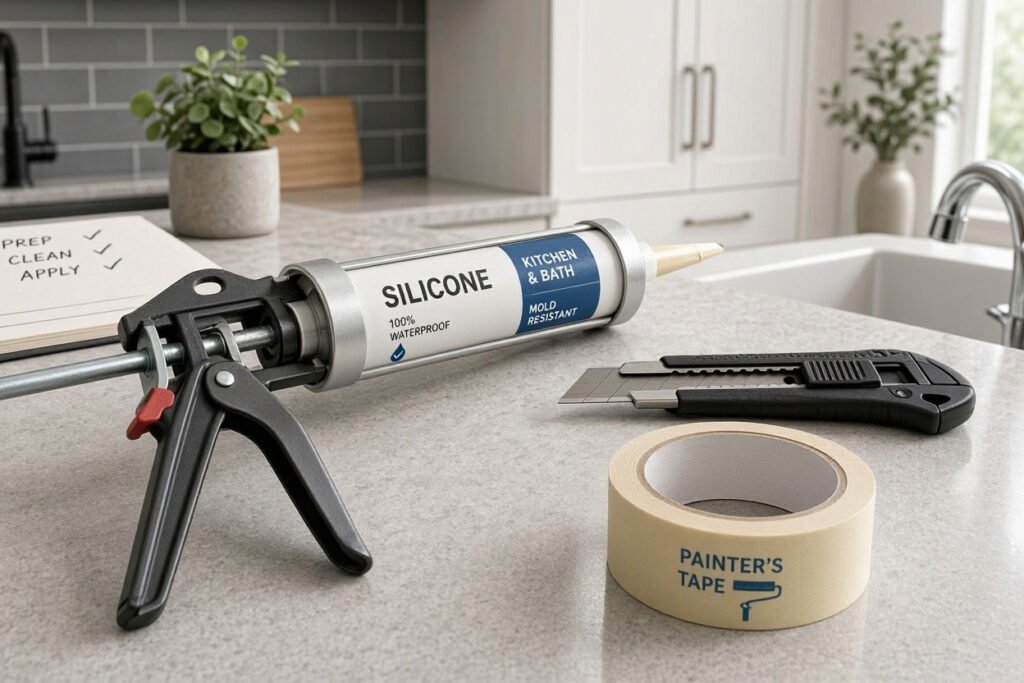
Step 2: Gather Your Tools and Materials
| Item | Why You Need It |
|---|---|
| 🟢 Sealant Kitchen and bath or stone-safe |
Creates a waterproof seal between compatible surfaces. |
| 🔶 Utility knife and plastic scraper | Cuts and lifts old caulk while helping protect the finish from scratches. |
| 🟣 Caulk remover Optional |
Softens stubborn old caulk. Follow the product’s specified waiting time. |
| 🔵 Isopropyl alcohol and clean rags | Help remove oils and residue so the new sealant can bond properly, when compatible with the surface. |
| 🔴 Painter’s tape | Helps create clean, straight edges along the new bead. |
| 🔷 Caulk gun | Provides controlled pressure for a consistent bead of sealant. |
| 🟩 Smoothing tool and soapy water | Help shape the bead. Use only a smoothing method compatible with the sealant manufacturer’s instructions. |
| 🟡 Backer rod For suitable wide gaps only |
Fills an appropriate deep gap and helps control sealant depth when the joint design calls for it. |
| ⚪ Plastic bag or drain stopper | Covers the drain opening to help keep old caulk and debris out of the plumbing. |
Step 3: Check the Gap Size
Before you buy or apply anything, look at how wide and deep the joint is. Caulk works best in a narrow joint. A bead that is too thick can cure unevenly and tear.
| Gap Width | What to Do |
|---|---|
|
SMALL GAP Up to about 1/4 inch |
A single bead of compatible caulk is usually sufficient if the joint is suitable for caulking. |
|
MODERATE GAP A little wider than 1/4 inch |
Some methods call for filling the deeper area first, allowing it to cure, and then applying a surface bead. Follow the sealant manufacturer’s directions. |
|
WIDE GAP More than 1/4 inch |
A compatible foam backer rod may be needed before caulking to control sealant depth. Choose the rod size and joint method according to product guidance. |
|
EXTRA-WIDE GAP More than 1/2 inch |
Consider a sealant specifically rated for wider joints or a suitable foam product, following the manufacturer’s instructions and the joint’s requirements. |
Thresholds vary by product (one GE guide uses 3/8 inch for plumbing joints), so follow the label on your sealant.
Step 4: Remove the Old Caulk
New caulk does not bond well to old cured caulk, so this is the most important step.
- Cover the drain so scraps don’t fall in.
- Cut along both edges of the old bead with a utility knife.
- Pull out the strip and scrape away what remains with a plastic scraper. Work carefully so you don’t scratch the sink or countertop.
- For stubborn caulk, apply a caulk remover and follow the product’s wait time. Some guides suggest a longer soak for tough silicone.
- Remove the residue. Even a thin film you can barely see can weaken the new bond.
Step 5: Clean and Dry the Joint
Wipe the sink edge and countertop with isopropyl alcohol on a clean rag. Then let the area dry completely. Caulk will not bond well to a damp or dirty surface.
Step 6: Tape Both Sides
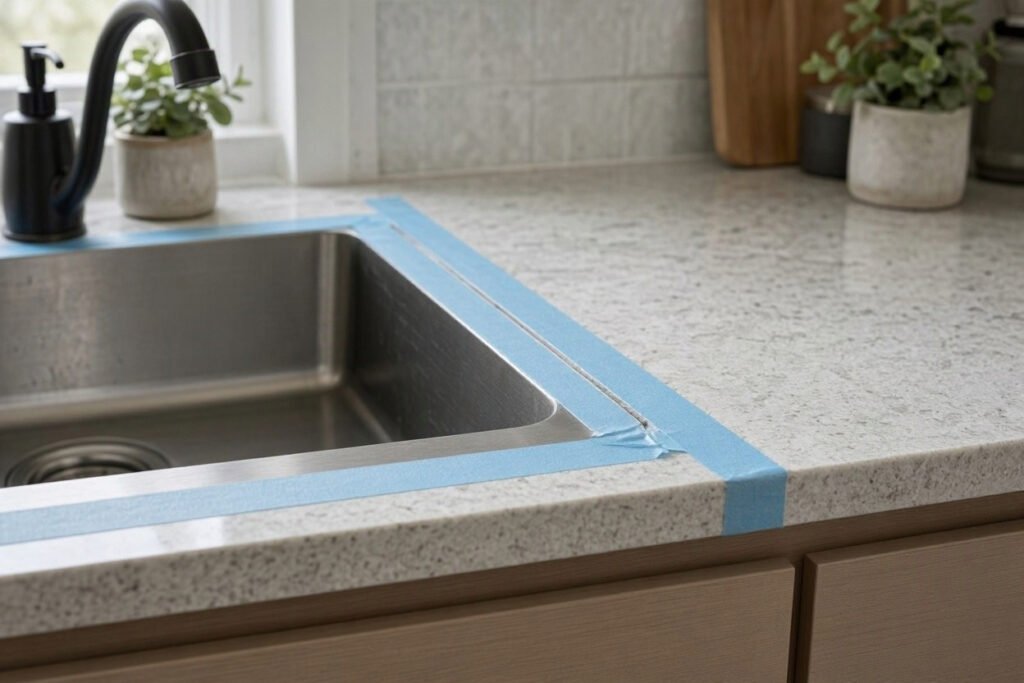
Run painter’s tape along the sink edge and along the countertop, leaving a gap the width of the bead you want. Press the edges down firmly. Any lift can let the caulk seep underneath.
Step 7: Cut the Nozzle and Load the Gun
Cut the tip of the tube at a 45-degree angle. Start with a small opening, because you can always cut more but you can’t make it smaller. Pierce the inner foil seal with the rod on your caulk gun or a long nail, then load the tube. Test the flow on scrap cardboard first.
Step 8: Apply the Bead
- Start at one corner of the sink.
- Hold the gun at about a 45-degree angle.
- Squeeze with steady pressure and pull the gun toward you in one continuous motion.
- Work around the whole sink without stopping, if you can. Pausing leaves gaps and uneven spots.
The bead should touch both surfaces and fill the joint completely, without a thick mound.
Step 9: Smooth the Bead
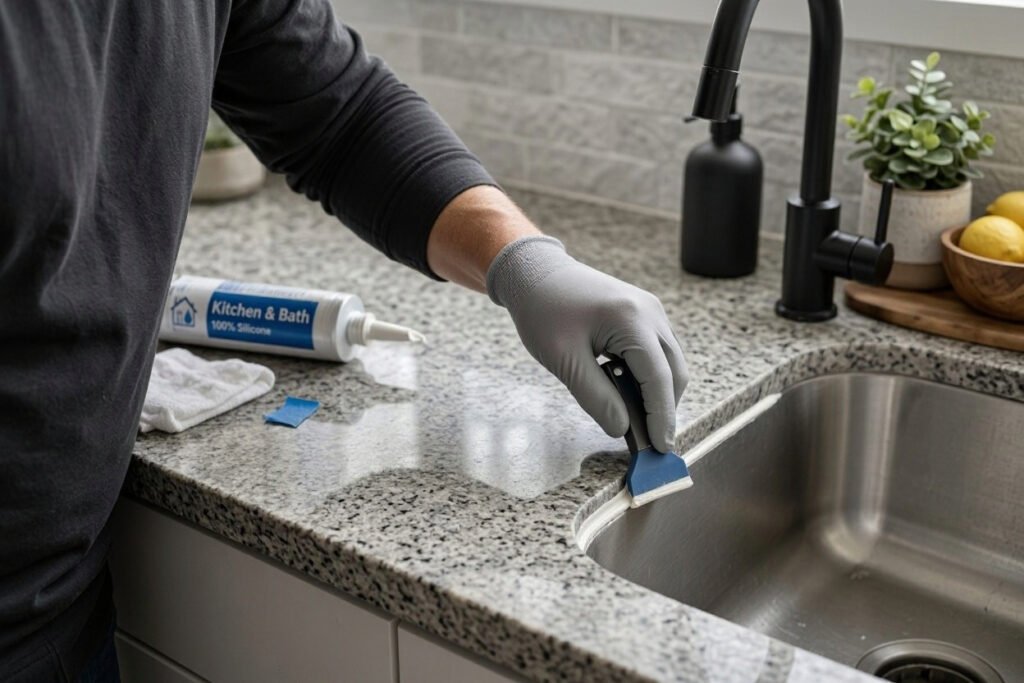
Smooth the bead before a skin forms. Use a caulk tool, or dip your finger in a mix of dish soap and water. Work in sections if the sealant starts to set quickly.
Step 10: Remove the Tape Right Away
Take the tape off while the caulk is still wet. Lift one end and pull it back at about a 45-degree angle, away from the bead, without touching the fresh caulk. If you wait until it cures, the tape can tear the edge. Follow the sealant label for cleaning up excess.
Step 11: Let It Cure
Do not use the sink until the label says it is ready. Cure times depend on the product and conditions.
| What to Know | Details |
|---|---|
|
01 · WATER USE Water-ready time |
Timing varies by product. For example, GE says its Tub & Tile Silicone 1 is water-ready the same day and fully cured in 24 hours. Always check the instructions for your specific sealant. |
|
02 · FULL STRENGTH Full cure |
Bostik states that a 3/16-inch bead of silicone normally cures in about 24 hours. Cool or dry conditions may extend curing to as long as 48 hours. |
|
03 · ENVIRONMENT Humidity |
Humidity can affect curing speed. Many moisture-curing silicones cure faster in humid conditions, but follow the product’s specified temperature and humidity range. |
|
04 · VENTILATION Smell |
Odor may be strongest during the first 24 hours. Keep the room well ventilated and follow all safety instructions on the sealant label. |
Top-Mount vs. Undermount Sinks
| Feature | 🟢 Top-Mount (Drop-In) | 🔵 Undermount |
|---|---|---|
| 📍 Where the caulk goes | Along the sink rim where it meets the countertop. | At the seam where the sink meets the underside of the countertop edge. |
| 💧 What it does | Seals the gap. During installation, many installers apply a bead between the sink rim and the countertop. | Seals the seam, while the sink is typically supported by mounting clips, adhesive, or another approved fastening method. |
| ⚠️ If the sink feels loose | The issue may involve the mounting system rather than the caulk alone. | Worn adhesive, damaged mounting clips, or corroded hardware may be contributing to the problem. |
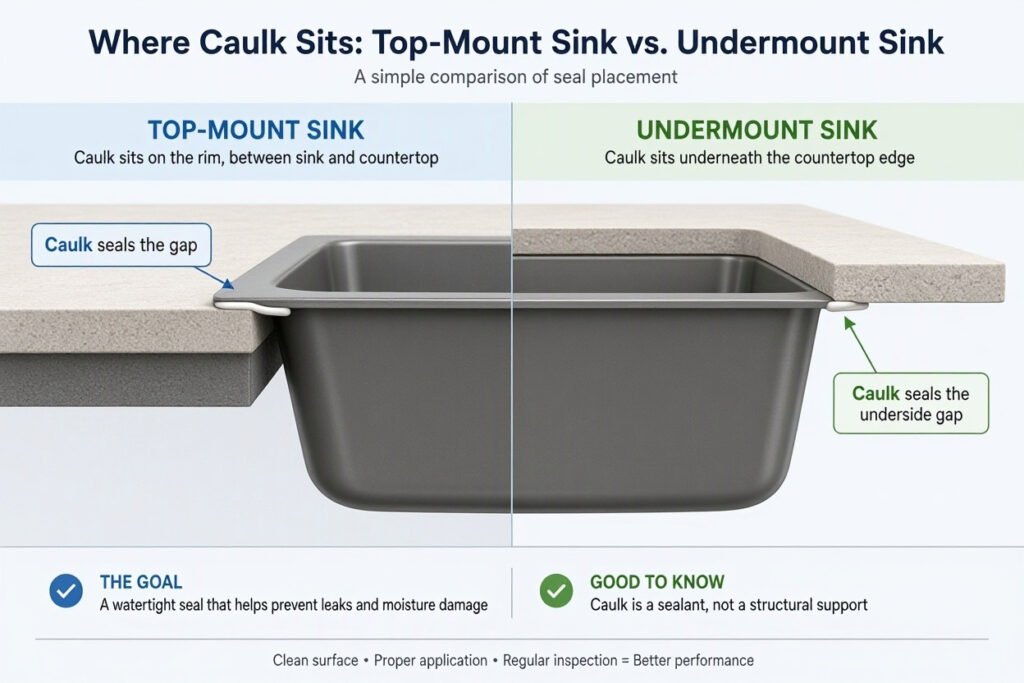
If an undermount sink has dropped or moves, re-caulking alone may not fix it. This Old House notes that improper installation, adhesive wearing out, corroded hardware, and excess weight can all loosen an undermount sink. See our guide to undermount small kitchen sinks, and if you are working on a top-mount sink, see our drop-in kitchen sink guide. If you are unsure about the mounting, ask a professional.
Troubleshooting Common Caulking Problems
| Problem | Likely Cause | What to Do |
|---|---|---|
| 🔴 New caulk peels or won’t stick | Old caulk, residue, dirt, or moisture remains on the joint. | Remove the failed bead and residue, clean using a surface-compatible method, and let the joint dry completely before resealing. |
| 🟠 Bead is thick and messy | The nozzle opening is too large, or painter’s tape wasn’t used. | Cut a smaller nozzle opening and apply painter’s tape along both edges for a cleaner bead. |
| 🟡 Gaps or bubbles in the bead | The gap may be too wide, or the sealant was applied unevenly. | Use a suitable backer rod when required for a deep or wide joint, then apply a continuous bead within the product’s specified limits. |
| 🟣 Caulk tears when removing tape | The tape was left on too long, or the sealant began to skin over. | Remove painter’s tape while the bead is still workable, following the sealant manufacturer’s instructions. |
| 🔵 Strong vinegar smell | Acetoxy-cure silicone commonly releases a vinegar-like odor while curing. | Ventilate the area and follow the product’s safety and curing instructions. If irritation occurs, leave the area and get fresh air. |
| 🩷 Dark staining on stone | The sealant may be incompatible with the stone or may be causing staining. | Stop using the product and consult the stone supplier or sealant manufacturer before selecting a replacement. |
| 🟢 Mold returns on the new bead | Persistent moisture, surface contamination, or an underlying leak may be contributing. | Address the moisture source, remove and replace failed or moldy sealant when necessary, and keep the joint dry. See our cleaning tips for compact kitchen sinks. |
| ⚫ Cracking soon after caulking | The joint may be moving, too deep, or sealed with an unsuitable product. | Check the joint depth, mounting stability, and sealant compatibility. Correct any movement or support problem before resealing. |
Common Mistakes to Avoid
- Caulking over old caulk. New caulk does not stick well to cured caulk.
- Skipping the cleaning step. Oils and film weaken the bond.
- Caulking a damp joint. Dry it completely first.
- Using the wrong sealant on stone or metal. Acetoxy silicones are not suited to some stones and metals, and some standard kitchen and bath products are not recommended for natural stone.
- Cutting the nozzle too big. A small opening gives you more control.
- Filling a wide gap with a thick bead. Use backer rod for deeper gaps.
- Using the sink too soon. Follow the label’s cure time.
- Pulling off the tape too late. Remove it while the bead is wet.
When It Is Not Just a Caulk Problem
Call a plumber or another qualified professional if:
- Water keeps showing up in the cabinet after you’ve re-caulked.
- The sink moves, sags, or has dropped.
- The countertop around the sink is soft, swollen, or damaged.
- You see widespread mold in the cabinet.
- You are working with natural stone and are unsure which sealant is safe.
Start with our guide to a leak under the kitchen sink, or use the Kitchen Sink Troubleshooting Tool to narrow down the cause.
Frequently Asked Questions
What kind of caulk should I use around a kitchen sink?
Choose a sealant labeled for kitchen and bath use, and check that it is suited to your sink and countertop material. Silicone stays flexible around water. If you have natural stone, look for a product made for stone.
Is silicone or acrylic latex caulk better for a kitchen sink?
Silicone is commonly recommended around sinks because it stays flexible and handles water well. Acrylic latex is easier to clean up and can be painted, but it may shrink more and need replacing sooner.
Can I caulk over old caulk?
No. New caulk does not bond well to old cured caulk, so remove the old bead and its residue first.
How long should I wait before using the sink?
Follow the instructions on the tube. Some products are water-ready the same day, but full cure can take 24 to 48 hours or more depending on the product and conditions.
Why does my caulk smell like vinegar?
Acetoxy silicone releases acetic acid while it cures, which causes the vinegar smell. It fades as the caulk cures, and ventilation helps.
Can I caulk a sink on a granite countertop?
Yes, but use a sealant that is suitable for granite or natural stone. Some manufacturers say their standard kitchen and bath silicone is not recommended on natural stone because it can cause staining.
How big a gap can caulk fill?
Caulk works best in joints up to about 1/4 inch wide, though limits vary by product. For wider or deeper gaps, many manufacturers recommend a foam backer rod first.
How often should I re-caulk a kitchen sink?
There is no fixed schedule. Check the seam every few months, and replace the caulk when it cracks, peels, or grows mold.
Final Thoughts
Caulking a kitchen sink is a manageable DIY job when you prepare the joint carefully. Remove all of the old caulk, clean and dry the surfaces, choose a sealant that suits your countertop, and apply one steady bead. Give it the full cure time on the tube before using the sink.
If the cabinet is wet, the sink moves, or the problem returns, caulk may not be the cause. Check the mounting and the plumbing, and ask a professional when you are unsure.
Sources and Further Reading
- GE Sealants: How to Seal a Kitchen Sink
- WACKER: KB Kitchen and Bath Sealant Product Page
- Bostik: FAQs on Caulk Cure Time
- The Home Depot: How to Caulk
- This Old House: How to Secure an Undermount Kitchen Sink
These sources provide background on sealant types, application technique, and cure times. They do not replace the instructions on your sealant label or the guidance of your sink and countertop manufacturers.
Get Helpful Sink Tips
Subscribe for practical sink planning tips and helpful resources for small kitchens and compact spaces.

Khadija is the writer and founder of Tiny Sink Solution. She creates practical guides about small kitchen sinks, faucets, and compact kitchen maintenance, helping homeowners and renters choose solutions for limited spaces. Some articles contain affiliate links, and as an Amazon Associate, she earns from qualifying purchases at no extra cost to readers